
Over the months, a layer of stems, roots and dead leaves builds up beneath the turf and never quite decomposes. When it is thin it is beneficial; when it grows too thick it becomes a sponge that holds water, blocks air and favours disease. Turf scarifying is the operation that keeps that layer under control.
However, it is an aggressive operation and needs to be done properly. In this article we review five steps: how to diagnose thatch, when to schedule the work, how to set up the machine, what to do with the debris and how to look after the turf during recovery.
Step 1: measure the thatch before turf scarifying
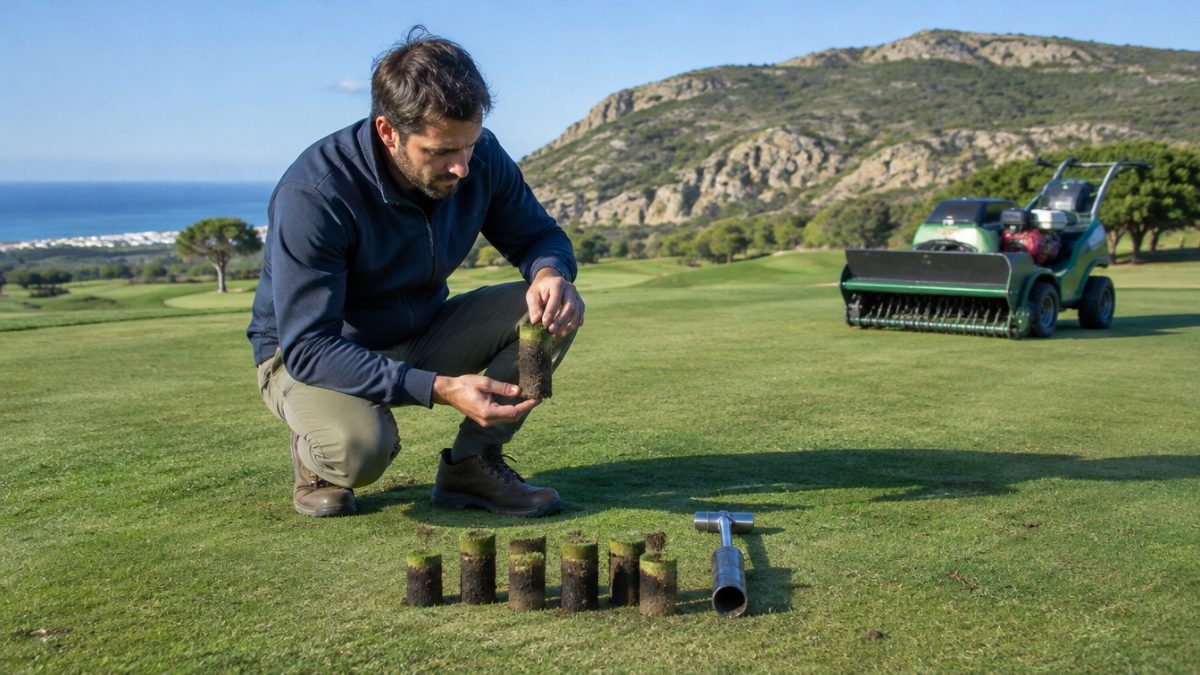
There is no single recipe for frequency or depth. The first thing is to know how much material is really there. Extract a core with a soil sampler or cut a small wedge in the turf and observe the profile: you will see the green layer, then a brown, spongy band, and below it the mineral soil.
As a rough guide, a layer of organic material of about one to one and a half centimetres on greens and tee boxes is manageable; if it is clearly thicker, turf scarifying and complementary operations become a priority. Other warning signs are:
- A spongy surface that sinks underfoot.
- Ponding after irrigation or rain.
- Frequent scalping when mowing.
- Repeated occurrence of foliar diseases.
Measure at several points on the course, because thatch thickness varies greatly between zones and species.
Step 2: choose the scarifying date according to the species
The timing is set by the turf’s ability to recover. If you scarify when it is barely growing, the wounds take weeks to close, bare patches appear and weeds move in. In warm-season species such as bermudagrass, the best period is usually with high temperatures and active growth, in late spring or early summer. In cool-season species, such as bentgrass or ryegrass, early autumn or spring is generally preferred.
Before settling on the date, consider:
- The weather forecast for the following two or three weeks.
- The tournament calendar and course occupancy.
- The availability of water, fertiliser and sand for recovery.
Avoid carrying out turf scarifying in extreme heat on cool-season species or in intense cold on warm-season species.
Step 3: set the machine and the working depth
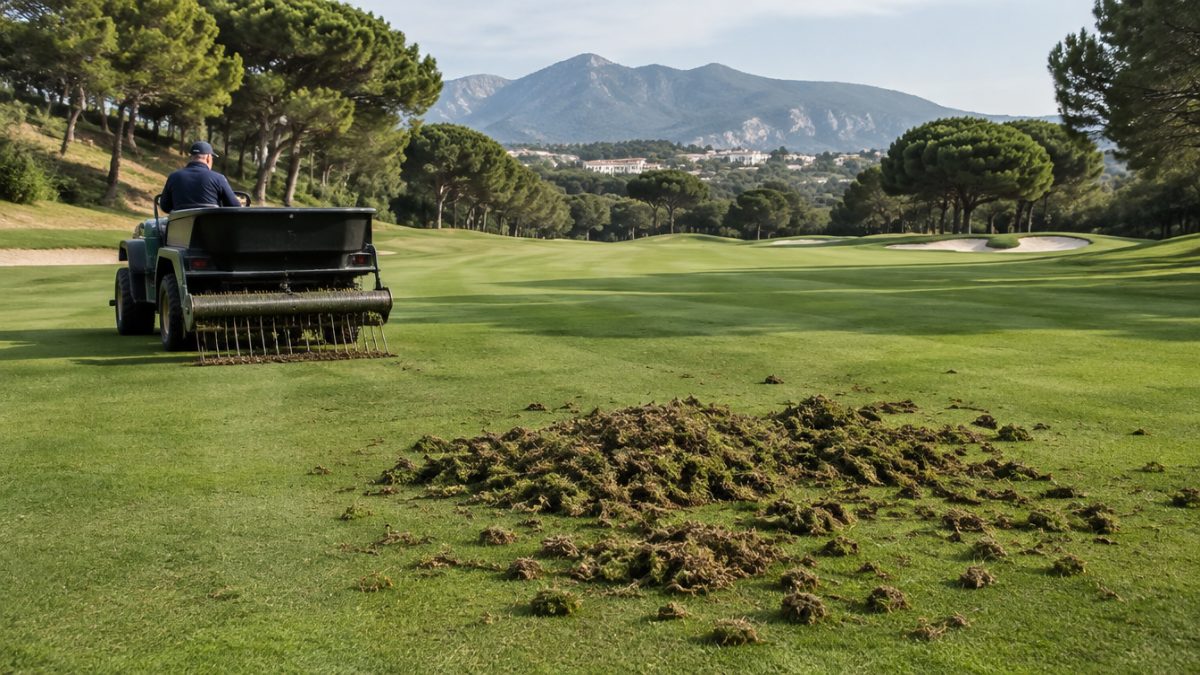
Setting up the scarifier is the key. A machine with blades that are too deep tears out healthy turf and leaves the course unrecognisable; too shallow, and it does not remove the problem. A good approach is to start gently and raise the setting gradually on a test area.
Recommended procedure:
- Make a test pass in a little-seen corner.
- Check the real depth of the grooves and the amount of material removed.
- Adjust blade height and speed before rolling it out across the course.
- Work in two perpendicular directions if the thatch is thick, though not always on the same day.
Check the condition of the blades before you start: very worn ones tear instead of cutting. On greens, turf scarifying should be lighter and more frequent than on fairways or roughs, where stronger interventions are acceptable.
Step 4: remove the debris and rebuild the surface
Scarifying lifts a considerable amount of material which, if left on the surface, smothers the turf and swaps one problem for another. Collecting it immediately, with sweepers, collectors or machines with a basket, is an essential part of the operation.
Afterwards, it is worth restoring evenness to the surface:
- Pass a brush or mat to stand the turf up and level it.
- Apply sand top-dressing, if the programme includes it, to fill the grooves and dilute the organic matter.
- Irrigate lightly to settle the sand and reduce stress.
- Reseed where bare patches have opened up.
The debris can go to composting if it is clean and does not come from areas treated with use restrictions. Consult current regulations if you have doubts about the destination of the waste.
Step 5: look after recovery and evaluate the result
The real quality of turf scarifying is measured in the ten to fifteen days that follow. During recovery, the turf is weakened and needs favourable conditions: constant moisture without excess, a moderate nitrogen input if the programme provides for it and reduced traffic.
Do some simple follow-up:
- Photograph the areas before, just after and two weeks later.
- Observe the colour, the density and the speed at which the grooves close.
- Note incidents, such as bare patches or later disease.
- Measure the thatch thickness again after a few weeks.
With that information you will decide whether to repeat the operation, adjust the depth or complement it with aeration and sanding. Remember that turf scarifying is no substitute for good management: if irrigation and fertilisation generate more material than is removed, the problem will return.
Common turf scarifying mistakes to avoid
Some failures are repeated on many courses and can be avoided with a little discipline. The most common is scarifying in a hurry, taking advantage of a quiet week in the diary without checking whether the turf is in a condition to recover. Next comes excess depth on the first pass, which pulls out more turf than necessary.
Other common mistakes:
- Leaving the debris on the surface for several days before collecting it.
- Forgetting the follow-up irrigation and letting the wound dry out.
- Scarifying on very wet soil, which tears, or very dry soil, which stops the blades from working.
- Not telling members and players about the temporary state of the course, which leads to avoidable complaints.
Well-planned turf scarifying is accompanied by advance notice and a simple explanation of the benefit it will bring. Players’ patience increases greatly when they understand the reason for the work.
Further reading: GCSAA. The GCSAA publishes technical resources on cultural practices such as scarifying and aeration.
Frequently asked questions
How often should turf scarifying be carried out?
It depends on the species, the vigour of growth and the management. On greens, light and frequent verticutting during active growth is usually preferred, while deep scarifying is reserved for one or two occasions a year. The most reliable approach is to measure the thatch and adjust according to the results.
Can turf scarifying be done in midsummer?
In warm-season species such as bermudagrass it is common to do it at high temperatures because it recovers quickly. In cool-season species it is risky because of heat stress. In any case, you must ensure irrigation, avoid extreme heat and schedule the work outside tournaments and the weeks of heaviest traffic.
Is scarifying the same as aerating?
No. Scarifying removes organic material from the surface using vertical blades, while aeration opens holes in the soil to improve the exchange of air and water. They are complementary operations: turf scarifying reduces thatch and aeration relieves compaction and encourages roots.
Keep reading
- thatch warning signs on greens and how to reduce them Thatch in greens: 6 warning signs and how to reduce it
- causes and solutions of soil compaction Soil Compaction: 5 Causes and Fixes on Golf Courses
- complete guide to turf maintenance on golf courses Complete guide to turf maintenance on golf courses